SUMMARY
In this release, we’ve focused on improving the user experience by…
- Including all available insurance payer contact information to snapshots
- Making it easier to request an insurance payer portal integration
- Incorporating status icon options on the Recall unscheduled patient list
- Expanding Location Hub reporting to include two reports, SR Schedule Link report and Secure Documents report
- Creating a Secure Documents report in Practice Reports
- Providing the practice name on the Secure Documents Authentication Page when there’s no practice logo
- Displaying help article quick links for Intake
- Incorporating the ability to issue full or partial refunds in SR Pay
- Adding a way to send manual follow-up payment requests
- Displaying more information on completed SR Pay transactions
- Showing new payment status options in SR Pay
- Squashing bugs
- Cleaning up the user interface
- Improving security and enhancing the backend
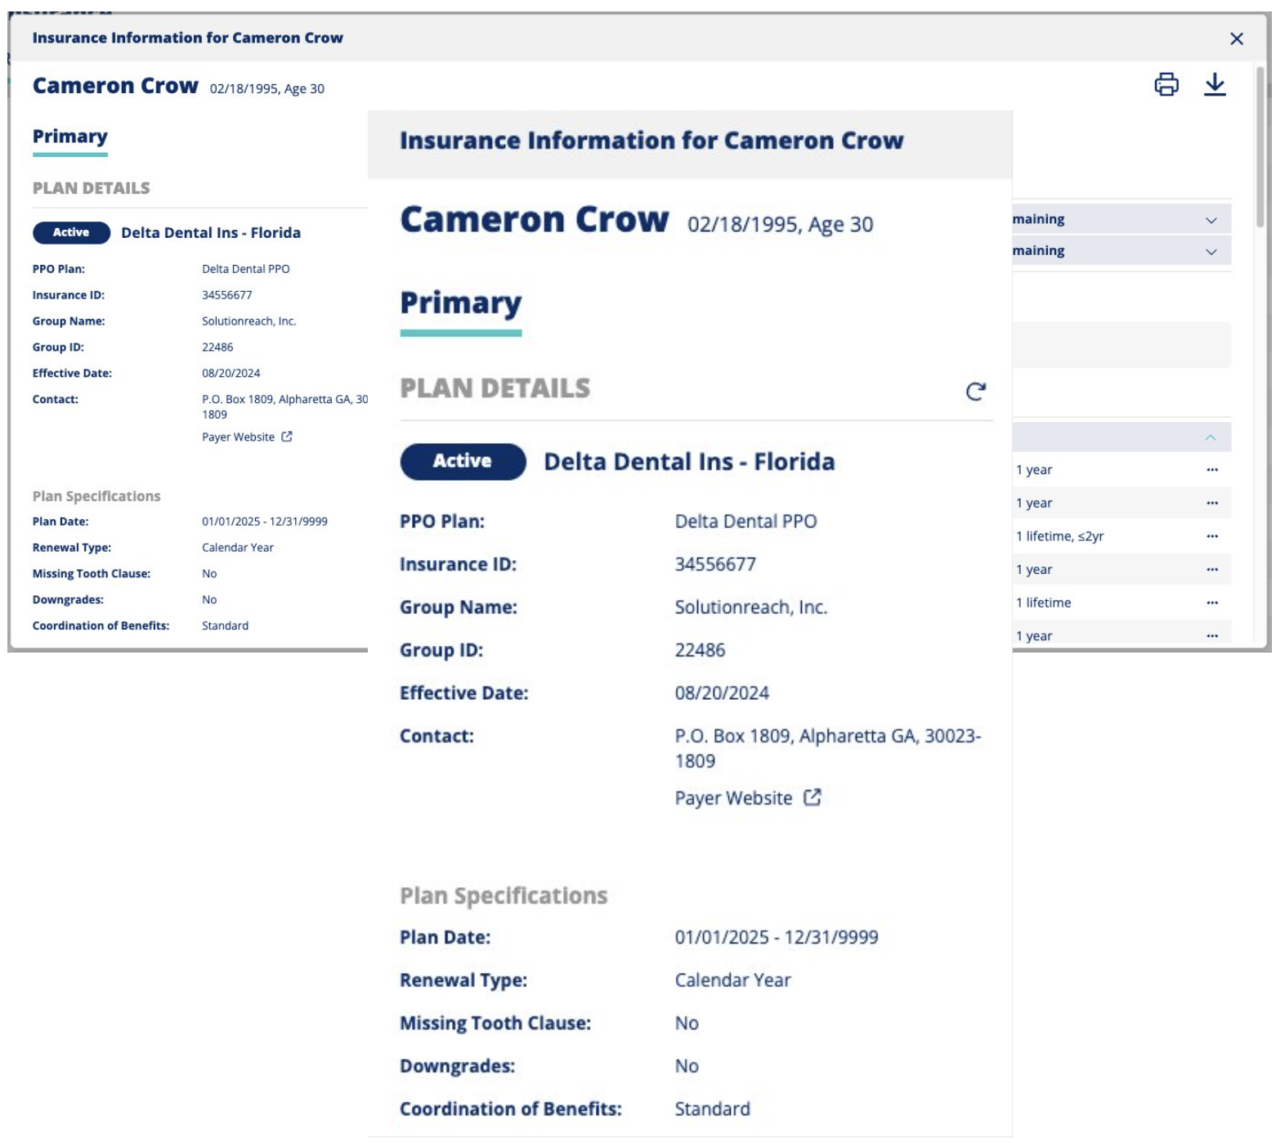
Insurance: Payer Contact Information on Snapshot
Why?
Payer addresses are needed for claims and some data points may not be available for us to display. We provide any contact details available to us within the plan details, making it easier for the user to contact the payer.
What you need to know:
- Users will see any available payer/company contact information on a patient’s insurance snapshot.
- You may see one or more of these contact details: payer address, phone number, and website.
- If no contact information is available, the “Contact” row on the snapshot is hidden.
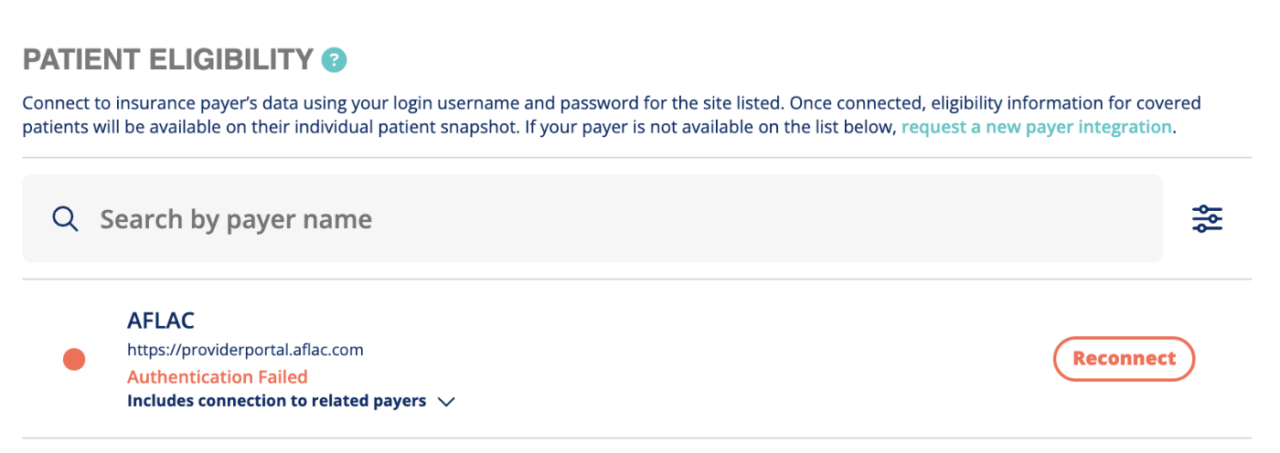
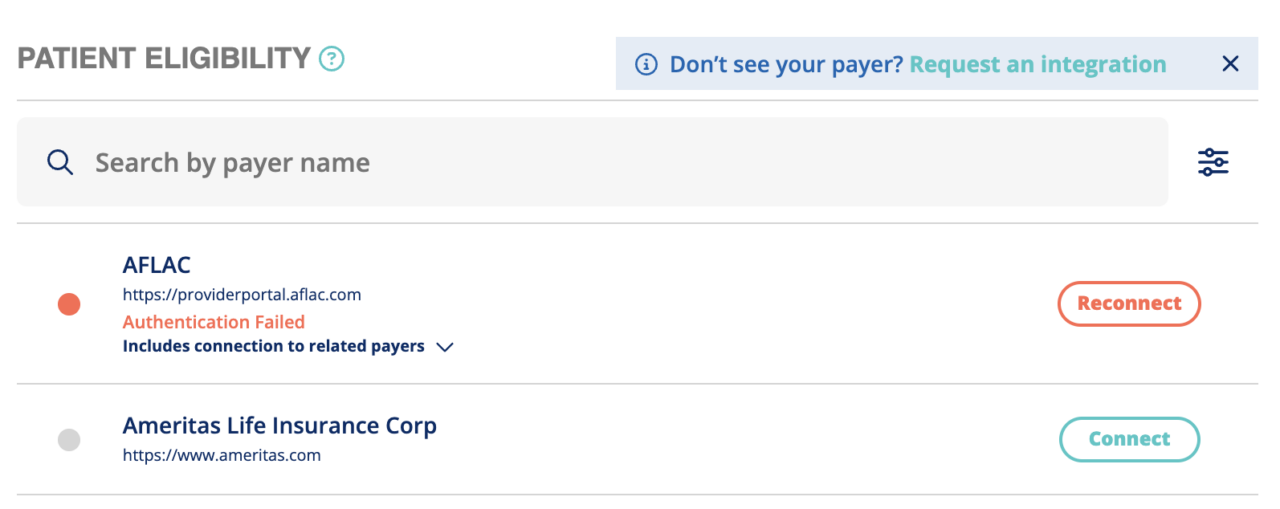
Insurance: Add Portal Connection Request Option to Settings Page
Why?
If a payer is not yet supported for Insurance Premium, users can submit a request for an integration. This form is now accessible on the Insurance Settings page.
What you need to know:
- On the Insurance Settings page, Insurance Premium users will see a dismissible blue banner with a link to “Request an Integration”.
- You can also click the informational icon next to the PATIENT ELIGIBILITY header to learn more about eligibility and access the “request a new payer integration” form.
- Clicking “Request an Integration” or “request a new payer integration” opens the page to enter credentials for the requested payer portal.
Recall: Added Icon Toggle to Unscheduled Patients List
Why?
Users can use organization-defined icons on the Unscheduled Patients tab to manage their manual call lists or other tasks related to Recall within SR.
What you need to know:
- Users decide what each icon represents.
- Icon options include: empty circle, solid circle, check circle, exclamation circle, and star.
- The status is stored and shown until removed by a user
- The Status clears if the patient is removed from the Unscheduled Patients list.
- If the patient appears at a later time, there will not be a status unless given a new status.
- Doesn’t affect ANY other page that has the icon status, such as appointments or Intake.

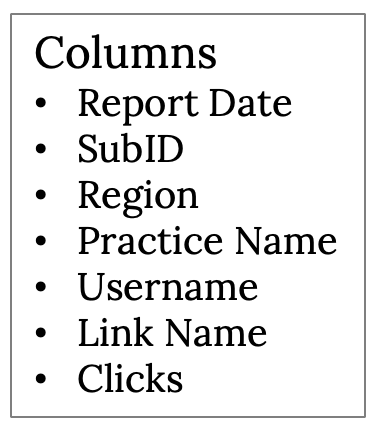
Location Hub: SR Schedule Link Report
Why?
Enterprise clients want to see the roll-up of the SR Schedule link clicks for links that they have added to different marketing materials and office websites.
What you need to know:
- Provided a new report located in Location Hub called SR Schedule Links
- The report provides the number of clicks for the unique SR Schedules links that were created by the practice(s).
- The report is run by date range.
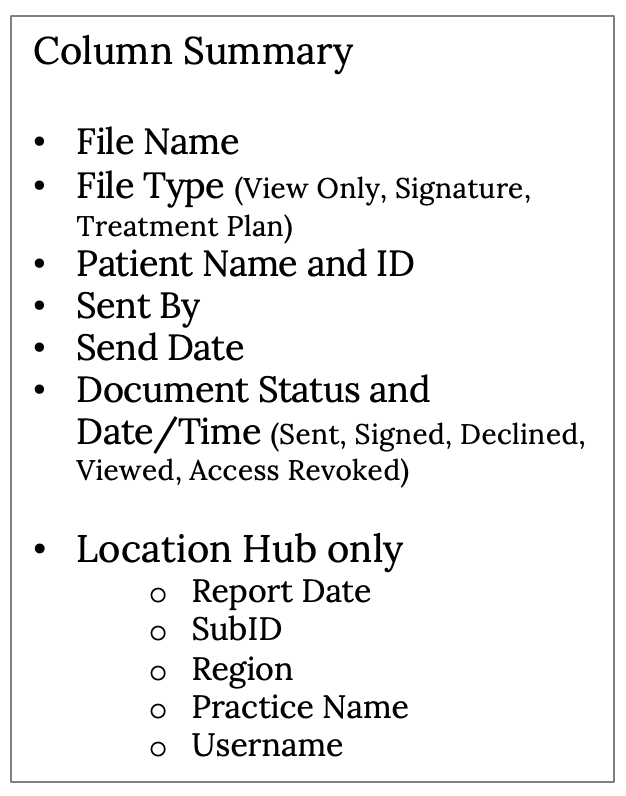
Secure Documents: Report Option
Why?
A new Secure Documents report in Practice Reports and Location Hub Reports allows users to gain insight into the number and type of documents sent and how patients interacted with the documents.
What you need to know:
- Report name = Secure Documents
- Finding the Report:
Need help finding the report? Check out these resources:
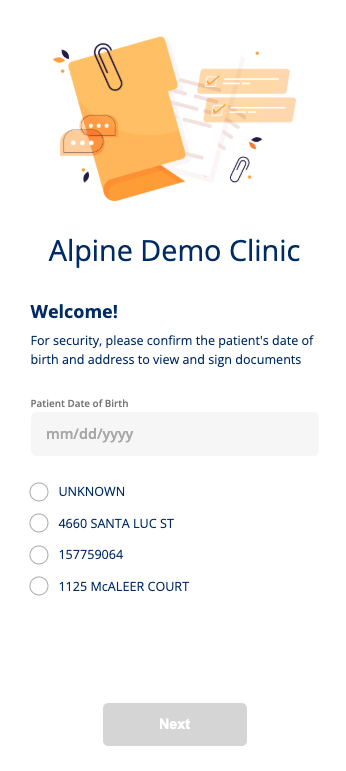
Secure Documents: Improved Default Practice Logo
Why?
Patients need to trust the websites they are visiting, providing practice information on the Secure Documents Authentication Page improves the patient experience and interaction.
What you need to know:
- If no practice logo is uploaded, the page displays the practice name and a secure documents default image.
- If the practice has uploaded a logo, the practice name is not displayed, only the practice logo.
- Not sure how to upload a practice logo? See steps here.
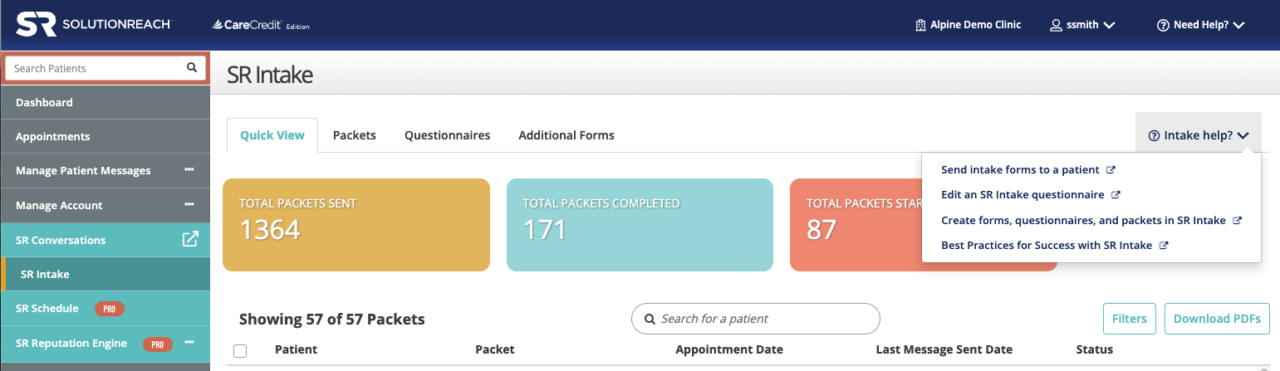
Intake: Help Article Quick Links
Why?
To assist with any questions about intake, we havev provided users with quick access to ‘how-to’ articles when creating and editing intake packets, questionnaires, and forms.
What you need to know:
- Click the “Intake help?” dropdown on any SR Intake tab to view quick links to help articles.
- Links open in a new tab so the user won’t lose their progress.
- All links are available on any of the Intake tabs.
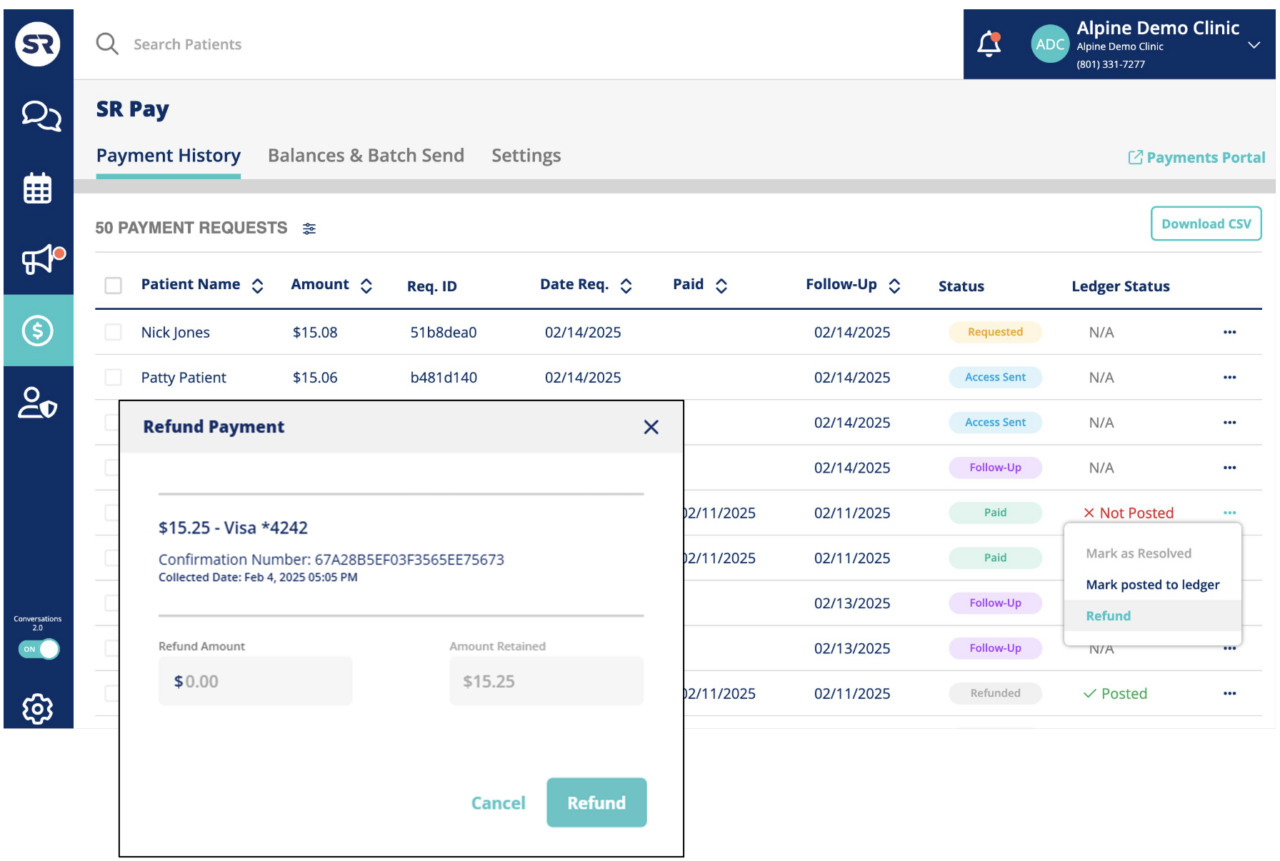
SR Pay: Refund Full or Partial Payments
Why?
Sometimes patients need a refund for incorrect or over payment. Because of this users need the ability to quickly refund patient payments from the Payment History table.
What you need to know:
- The refund option is only available for customers using the in-house SR Pay solution. (Not available for Rectangle of Finvi)
- Only payments in “Paid” or “Authorized” status can be refunded.
- Click the “…” menu and select “Refund”
- In the pop-up modal, enter the amount you wish to refund and click the “Refund” button.
- Refunds can be any amount up to the original payment amount.
- Personnel users must have the Refund Payments permission to issue refunds.
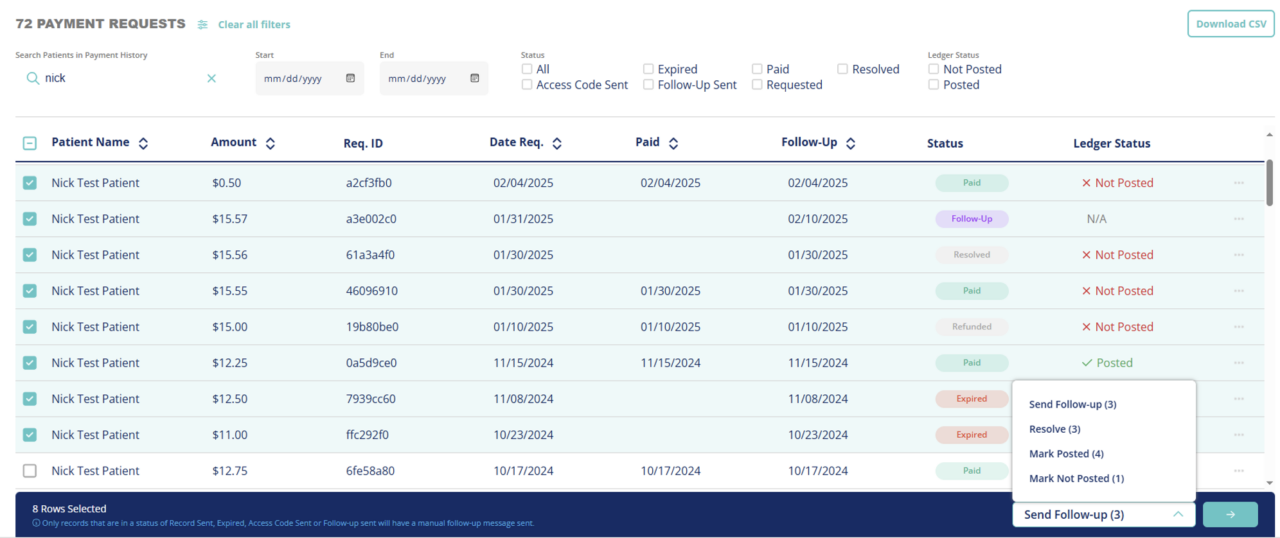
SR Pay: Take Action on multiple payment records
Why?
Users need the ability to quickly perform actions on more than one payment record at a time. Actions available include sending follow-ups, resolving payment requests, or marking transactions as posted in their ledger.
What you need to know:
- On the Payment History table, use the checkboxes on the left to select more than one record. The Select All option only worksifthe records have been filtered.
- Take action on the payment records by performing available actions on the bar at the bottom of the page.
- The number in parenthesis on each action indicates how many records are updated with that action.
- You can perform multiple actions per record.
- A tool tip on the bar provides additional information ontheaction and records impacted.
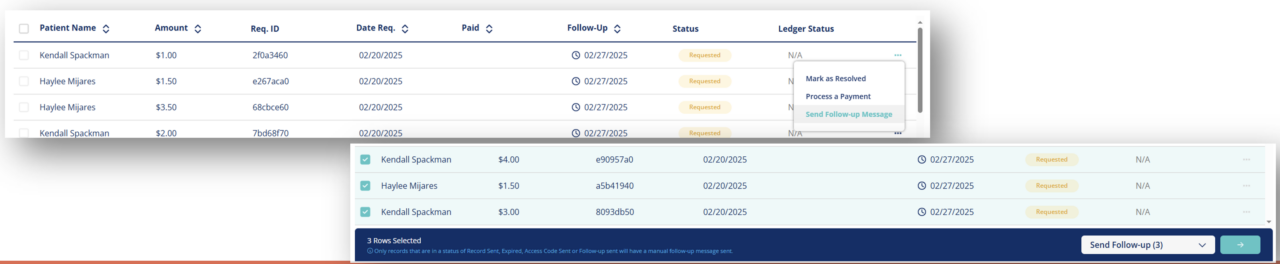
SR Pay: Manual Follow-Up for Payments
Why?
To collect more payments, users wanted the ability to trigger additional follow-up messages for patients that need more than onereminder before completing their payment.
What you need to know:
- In-house SR Payusers can send an individual follow-up message from the Payment History table.
- All SR Pay users can send follow-up messages from the Payment History table using the multi-select option.
- Any payment request not “Paid” or “Resolved” can receive a follow-up message, including expired messages.
- Expired messages have 45 days from the follow-up send date before they expire again.
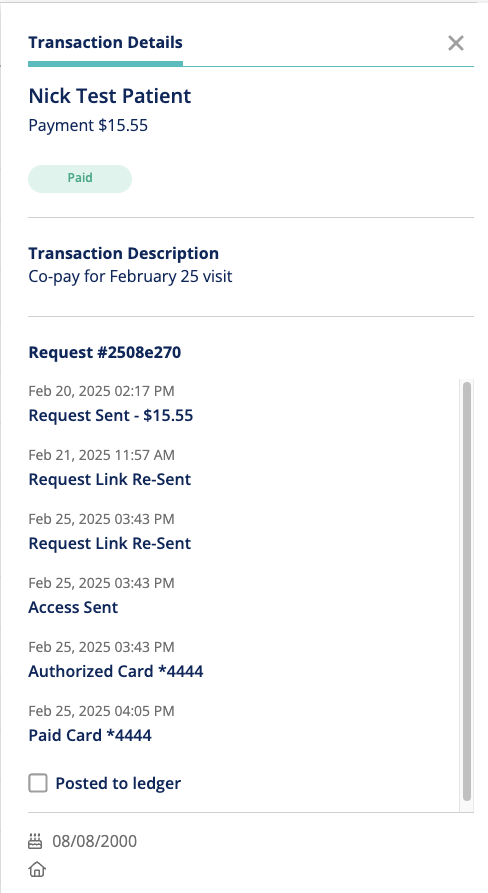
SR Pay: Transaction Details Panel
Why?
SR Pay users need more information on when payment statuses occur and if the payment has been posted to the ledger so that they can better track payments within Solutionreach.
What you need to know:
- Click on any payment record on the Payment History to open a transaction details panel.
- The panel contains the details of the transaction including a timeline of when transactions changed status.
- At the bottom of the timeline, you can mark the transaction as posted to the ledger.
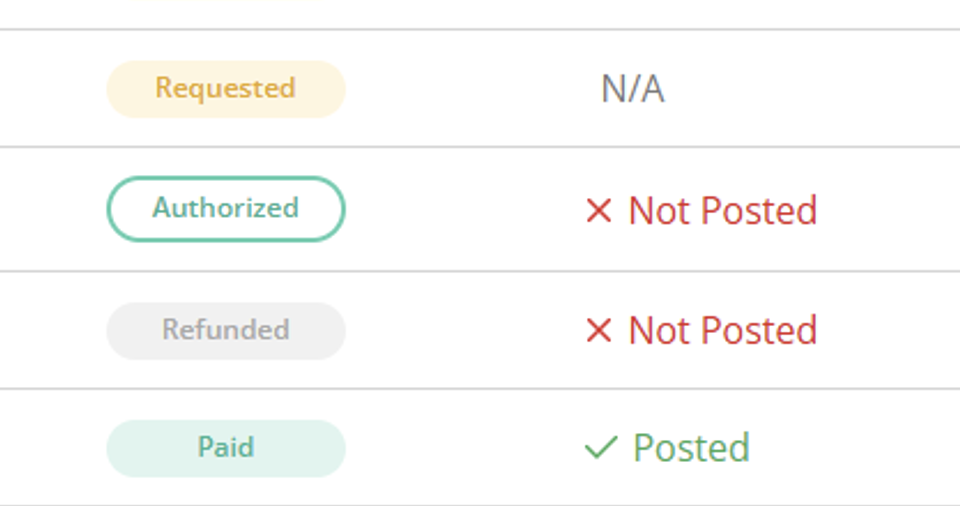
SR Pay: Payment Status updates
Why?
Users utilizing the in-house SR Pay solution have additional functionality and payment statuses. Adding the “Refunded,” “Partial Refund,” and “Authorized” statuses to the Payment History table provides users more insight on payments and requests.
What you need to know:
- “Refunded” and “Partial Refund” statuses indicate that the payment amount has been adjusted.
- “Authorized” indicates the payment has been submitted by the patient, but the amount has not been captured.
- A payment that has not been captured means that the funds are not yet available in the client’s bank account, but the payment is processing.
Bug Fixes and Improvements
SR Intake
- Edited questionnaire titles not updating as expected
SR Pay
- Payment receipt no longer blank when downloaded
- Manual Payment option available regardless of device status
- Improved Payment History table filtering and sorting
- Fixed a misaligned drop down on the Payment Request modal
- Take Payment modal fields not appearingon first attempt
- Ad-hoc Payment not correctly updating on Payment History
SR Schedule
- Fixed broken image for No Provider Preference option
Insurance
- Removed autofill of username/password on integration request
- Secondary insurance displayed incorrectly on Take Action Calendar snapshot
Huddle
- Added a red dot for new messages
- UI Improvements
Take Action Calendar
- Multi-Locations tab on Appointments page in Conversations not displaying correctly
Location Hub
- Issue with editing existing users
- Incomplete login report
Other Fixes
- Added missing Favicon on Newsletters > Add Campaigns page
- Resolved 404 Errors on multiple pages
- Reputation Engine profile not updating correctly
- Secure Documents uploads failing
- Branding updates to Surveys practice interface